It is strongly recommended that you read the Installation Instructions before the installation. The Installation Instruction file in PDF format is on the setup CD.
A couple of issues that we are going to discuss here.
1. Location of Setinit.sss
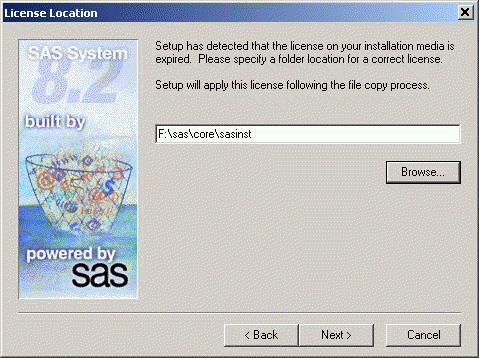
Most likely, the first thing that you are asked to do after starting up the setup process is to provide the location of setinit.sss file. For example, you may see the following screen shot.

You may have obtained the setinit.sss file from an email. You can save it to a file called "setinit.sss". Remember, when you save it using a text editor, say notepad, you will have to enclose the file name in quotes, otherwise, it will be saved as "setinit.sss.txt" file and SAS will have a trouble seeing it as an .sss file. Let’s say that we have saved the setinit.sss file in D:temp directory. Click on Browse and you will see a window as follows. Point the path to the place where setinit.sss is located. In our case, we specify the path to "D:temp" by choosing "D:" in the Drives field and choose "temp" in the Directories field. Then click on OK. The setup process then will continue to next step.

2. Location of temporary WORK directory
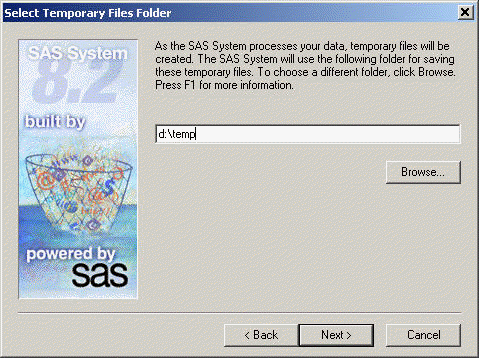
SAS will pick up a default folder for the temporary files created during an active session of SAS. Unfortunately the default place is usually NOT the best place. This is because it is set to be in a windows temp directory and this is usually on C drive which may not have very large space as compared with other drives.
We can specify a folder for temporary WORK directory during the setup process. For example, in our example, D:temp is the place where we have a lot of space and we want to create temporary SAS files there. We have a chance to specify it when the following window is prompted. Replacing the default directory with the d:temp in the field shown in the screen shot and proceed to next step.

